
How to Create a Payment Button
Follow the illustrated dashboard steps to configure, test, publish, and embed a FiatPe Payment Button.
How to create a Payment Button
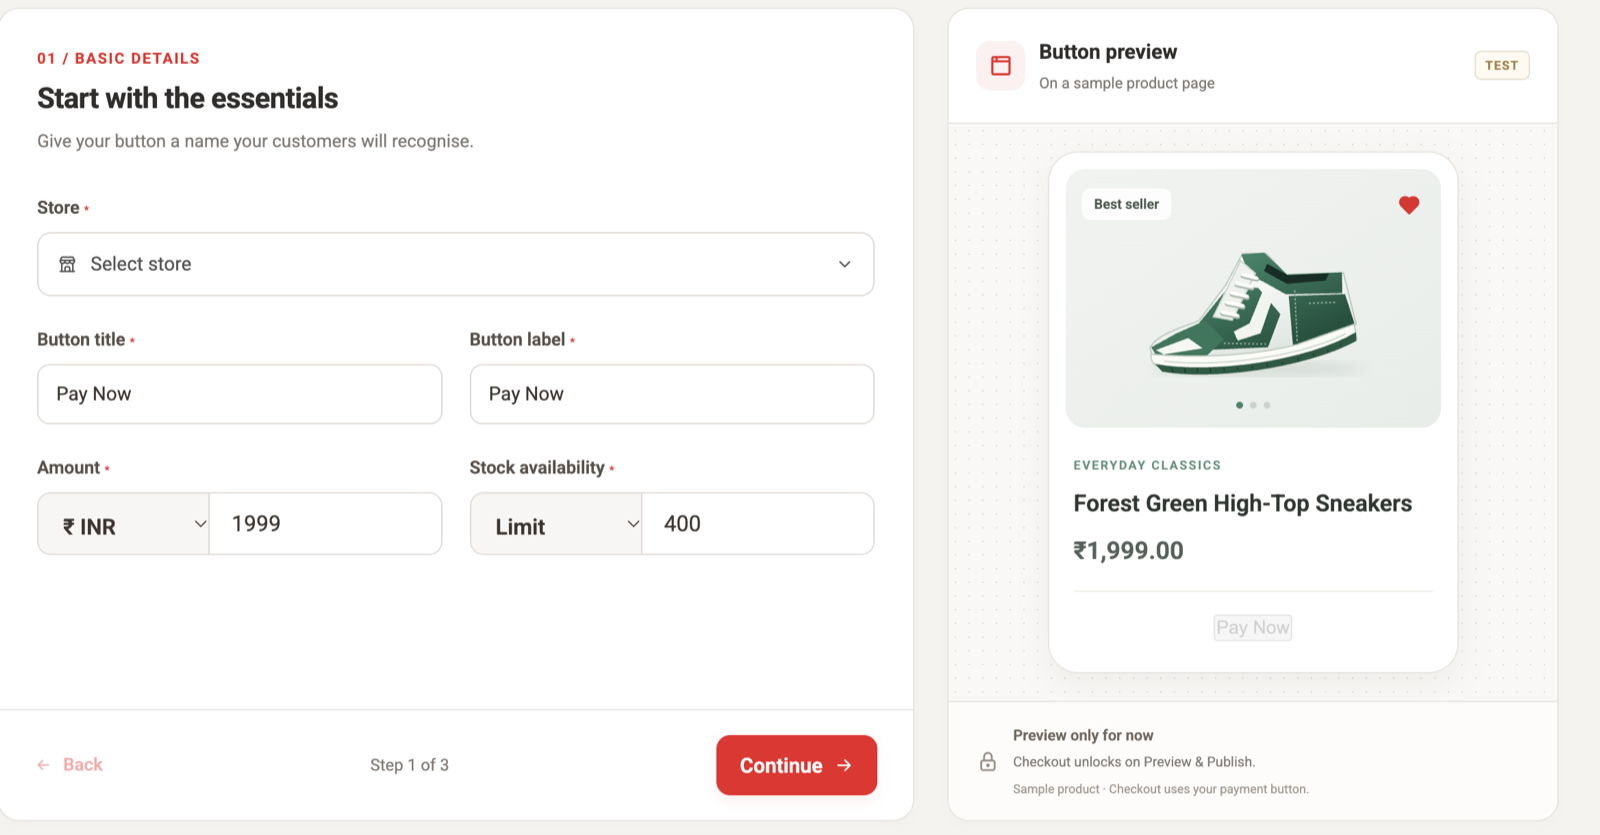
Create the button from your FiatPe dashboard in three guided stages. Keep the preview open while configuring it so you can confirm how the purchase action will appear to customers before publishing.
Configure customer and order fields
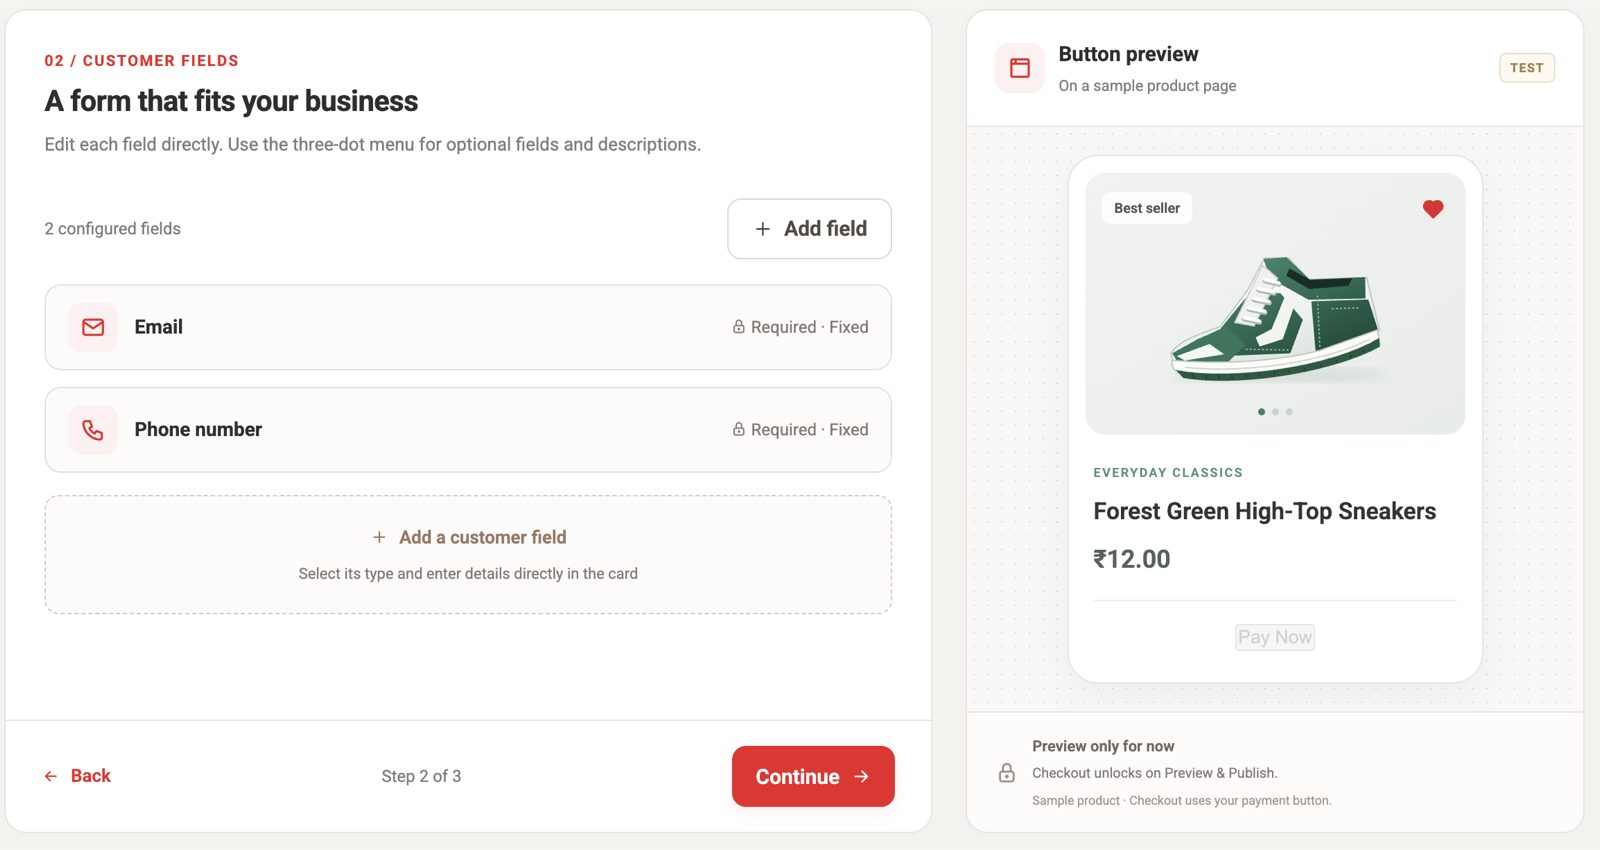
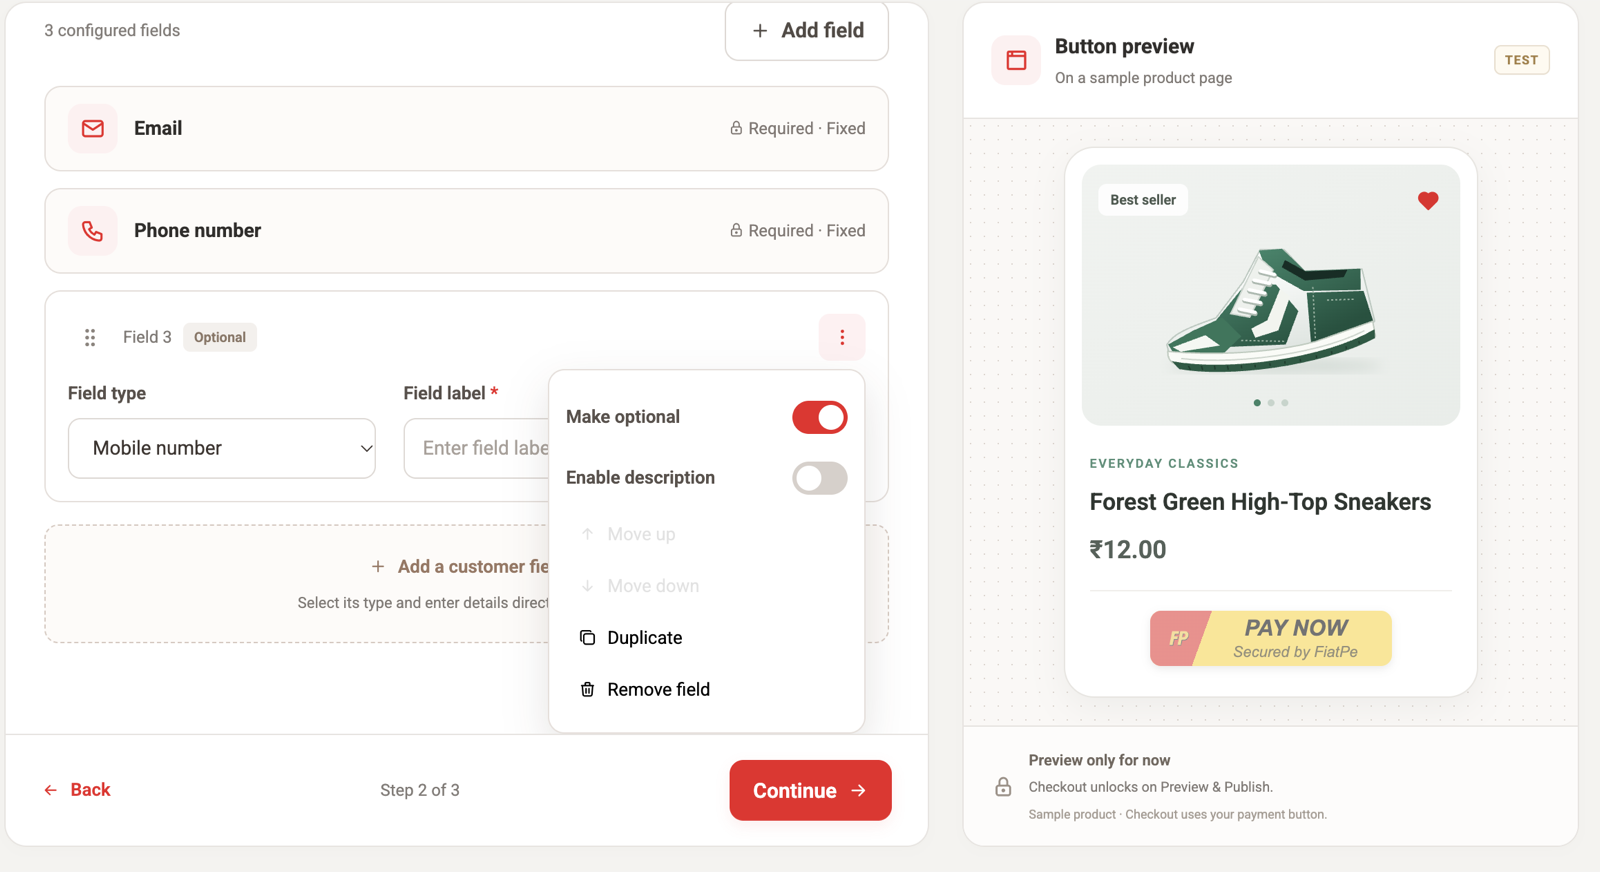
Email and phone number provide the core contact details. Add custom fields for information such as an attendee name, delivery note, booking reference, size, or other fulfilment detail. Each custom field can have its own label, description, and required or optional state.
Card numbers, CVV, UPI PINs, passwords, and other authentication data must only be entered inside the secure FiatPe Checkout experience.
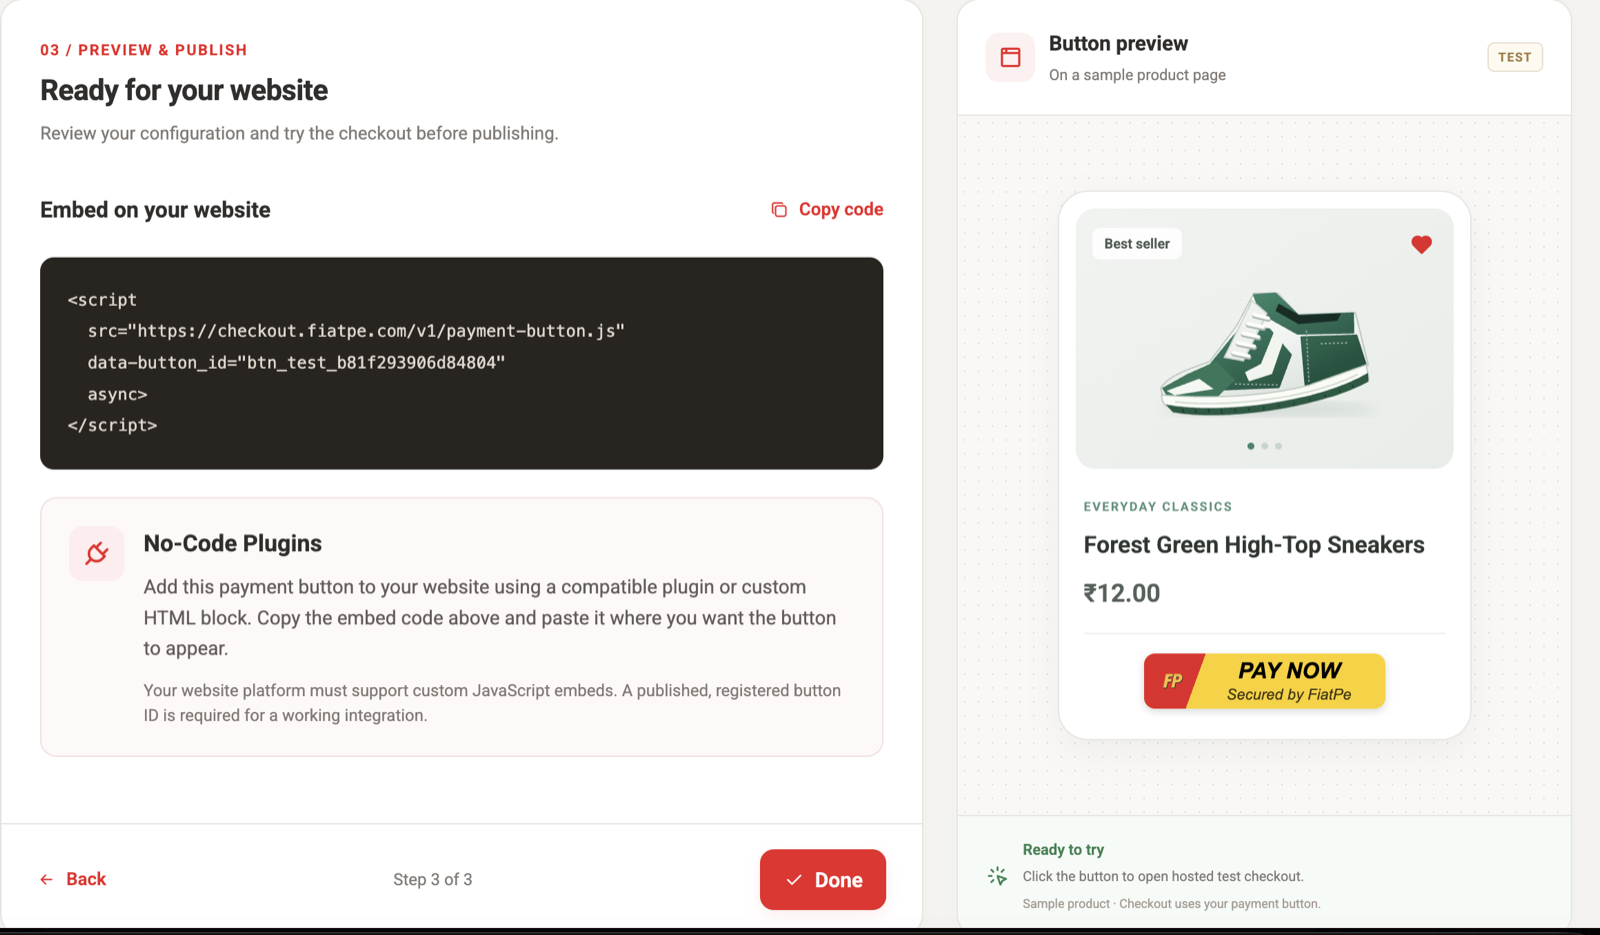
Embed the generated script
Paste the exact generated code into the page where the payment action should appear.
- Place the script once for each button placement.
- Do not change the generated
data-button_id. - Your website or CMS must permit third-party JavaScript embeds.
- The
asyncattribute lets the rest of the page continue loading while the button script downloads.
Customer payment flow
Customer selects the button
The embedded button loads the configuration associated with its button ID.
Details are collected
The customer completes the configured fields and reviews the amount.
Checkout opens
FiatPe Checkout securely collects the selected payment method and authentication.
Payment is confirmed
Use the payment status and webhook event as the source of truth before fulfilment.